This was for my little red head's birthday last week. She wanted the motorcycle girl from the Rock Princess cartridge on her card so, of course, I obliged. :) I added the flame from the flaming heart on the same cart. Love this cart, so many possibilities with it!
Friday, October 22, 2010
Thursday, October 21, 2010
Saint Nicholas already?
I don't have many wall hangings for holidays. Mostly figurines and other knick knacks to put around. I'm changing that and making my own holiday wall art. I got this great graphic from the Graphics Fairy. Added some pretty scrapbooking paper on top of the mat. And since the paper wasn't big enough to cover the mat in one piece, I put the lace and ribbon over the "seam". Put it all in a frame I wasn't using anymore. Easy, easy.
Wednesday, October 20, 2010
Vintage Looking Christmas Ornament
I know it's a little early for Christmas stuff but I've had this project sitting and waiting for me for a year now. I made these as little gifts for my family last year at Thanksgiving but never made myself one. (Isn't that how it always goes?) It is made from an empty spool of ribbon, a little paint, a vintage looking Christmas card, scrapping paper, ribbon, and glitter glue.
Linking to these parties.


Sumo's Sweet Stuff "Market Yourself Monday"

Linking to these parties.


Sumo's Sweet Stuff "Market Yourself Monday"

Thanksgiving card
I'm entering this card I made with both the Happy Hauntings cart and the Accent Essentials cart into the Falling Leaves challenge at Fantabulous Cricut Challenge Blog.
Monday, October 18, 2010
Yummy cupcakes
My daughter had her 7th birthday this last week and these are the cupcake treats I sent into school with her. They turned out so cute, I couldn't help but post them on here. :) I used the Rock Princess cartridge to make the picks to put in the cupcakes.
Monday, October 11, 2010
Sleepy Hollow Silhouette
I bought some inexpensive frames last week at Walmart for my daughters' school pictures but when I got them home I decided I wanted some nicer ones, or should I say more durable. My husband likes the headless horseman cut out on the Happy Hauntings cartridge so I made him an awesome halloween picture. A tip for this headless horseman cut (there are two different horsemen on this cart) is to double it's size if you want it large. I cut it first at 7 1/2 inches and it was way too small. For the size in the frame I cut it at 14 inches. (the frame is 11x14) The RIP was cut at 2 1/2 inches and I used some chalk on it to give it a mossy look, although I'm not sure it shows in the picture. The background paper was one I found at Jo-ann's in a clearance bin. I'm entering Challenge #31 at Fantabulous Cricut and linking to these parties.


Sunday, October 10, 2010
My Pink Stamper Challenge
Here is my entry for the winter challenge over at My Pink Stamper. Hope you like it. I had fun working on it and now I'm in the mood to make more Christmas cards. Yay! Maybe I can get ahead of schedule this year. :)
Monday, October 4, 2010
Spooky ghosts
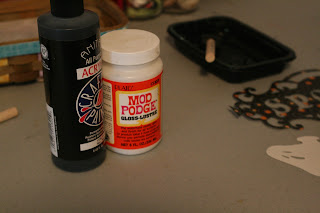
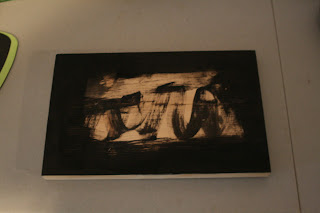
I was inspired to make something today and I wanted to use my Happy Hauntings Cricut cartridge. I went rummaging in the garage for a piece of wood. As luck would have it, I found the perfect piece and then painted it black.
I cut the Spooky phrase from the Happy Hauntings cart at five inches. I tried it with plain white paper before I used my good scrap booking paper, just to make sure. The ghosts, I cut one at five inches and the other at four inches.
Then I mod podged everything on.
I sanded the edges for a distressed look and then used distressing ink around it.
Labels:
Cricut,
Halloween,
Home Decor,
Paper Crafts,
Tutorials
Subscribe to:
Comments (Atom)


